

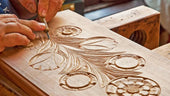
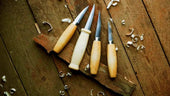
A Must for Newbies: An Easy-to-Follow Guide to Letter Carving in Wood
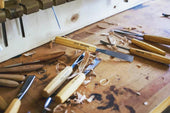
Do you want to know how to carve letters in wood? If you are interested in this topic then start reading this article with me! Actually, carving letters on wood is not as hard as you think, you just need to prepare some basic carving tools, a piece of wood that you are going to use for carving and that's all you need.

Some notes:
- Preparation of wood: for newbies, you'd better choose some wood with softer texture, such as basswood or walnut. Because those harder woods are not so friendly to newbies. On the one hand, it is difficult to carve, and on the other hand, you may hurt your hand when carving.
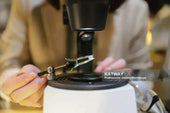
- Preparation before carving: before carving, you'd better carve out the letters you want to carve on the wood initially. This can reduce some unnecessary mistakes in the carving process. After you have written the letters, you can use a chisel with a hammer to chisel out the initial outline you want on the wood. Or if you have a carving machine on hand, you can just use the carving machine for this step. But overall, a carving machine will save you a bit more time and effort.
Let's start carving!
- Choose novice-friendly softwood for carving. The reason for choosing softwood is that it can help a novice carver quickly familiarize themselves with the process of wood carving, and the other is that softwood won't easily cause damage to your carving tools. If you really don't have that, or if you have carved wood before and want to do something more challenging. You can then choose some harder textured wood like cherry or maple. Note that you will need to go a little slower when carving.
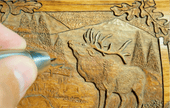
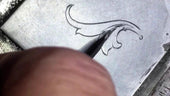
- If you choose to use a pencil to initially carve the letters on the wood, there are a few other details you need to know. It's best that you choose a block font when writing the letters, as this is a relatively good font to carve in now. It's best that you don't press hard on the wood while you're writing, as this may leave marks on the wood that are hard to remove. Also, if the wood you are carving is darker in color, you may choose to use a white pencil so that you can see it more clearly.
- You can trace the letters you want to engrave on copy paper if you want to choose a print font. All you need to do is type the letters you want to print on your computer, then resize him to an appropriate size and print it. Take out a piece of copy paper and place it under the paper you just printed out, and underneath the copy paper is the wood you want to carve. Next, take out your pencil and trace over the outline of the letters with it so that the letters are imprinted onto the wood. You'll want to be best careful during this process, taking care not to rub the paper, or you may rub some other stains onto the wood, which will likely have an effect on the subsequent carving.
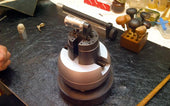
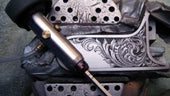
- Secure the wood you're going to carve tightly. You can go ahead and purchase two clamps that are designed to secure the board to the tabletop. Then refer to the instructions to secure the plank to the tabletop. You'd better make sure that the clamps won't get in the way of your subsequent carving. Finally, before carving, you'd better try to push the wood first to prevent some unforeseen accidents in the subsequent carving process.
- Take out your engraving tools and get ready to start! The carving tool you need to take out here is a right angle chisel to carve out the inner outline of the letters. Let's start with what a right angle chisel is! A right-angle chisel has a v-shaped end. You simply turn the v-shaped end upwards and slowly carve into the wood. If you're still not quite sure about letter carving, you can start by practicing with some small pieces of wood. While carving, you'd better not put your hand on the blade. This is because if it slips, your hand is likely to get injured. After you have essentially carved the inner contours of the letters, you can use a carving tool with a relatively flat tip. Flat chisels are good for carving straight edge styles.

- Some aids you might use. If the wood you are carving is very hard, you can use some aids such as a small hammer. You can tap the end of the chisel with the hammer and this will save you some effort during the carving process. But you need to be careful not to hit it too hard or you might ruin your work.
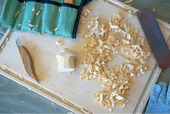
- Next, proceed to carve your piece. Follow the same steps as above. Be sure to make sure that you carve within the letters you are depicting so that you get a cleaner carving surface.
- The final step, sanding. After you have finished carving, you can do the final sanding of the wood. Here you have the option of sanding with sandpaper. The grit of the sandpaper can be either 80 or 100, and you can actually choose the grit of the sandpaper to your liking. If you have a sanding machine, you can also sand the inside of the letters. And while sanding, you'll need to make a final decision about the depth of the letters you're carving. If the letters are shallow, you'd better not sand them too much so that the letters will lose their original details. It is also a good idea to remove any pencil marks that you may have left next to the letters when sanding. This will ensure that the work is beautiful and neat.
View more related articles
Jewelry and Jade Identification Tools
Advantages and disadvantages of machine carving and hand carving


You May Also Like
-
The New Favorite of Handmade Wood Carving Industry - Pneumatic Engraving Machine
With the advancement of modern science and technology, tr...
-

Metal Engraving Techniques That Beautify Jewelry
Just as one is always willing to be drawn to something mo...
-
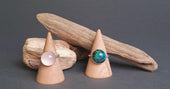
How to Make a Gemstone Ring?
Discover how gemstone rings are made and experience the u...
-
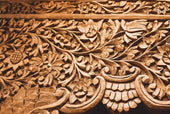
How to practice carving flowers technique in wood carving
Whether it is the complicated and delicate flower cluster...
-

What Tools Do You Need to Be a Silversmith?
This is a beginner's guide to silversmithing. Many people...
-

How Do Beginners Make a Simple Silver Ring?
Making a silver ring for your lover is a very romantic th...
-
What Kind of Microscope Do Jewelers Use?
Microscopes are called the third eye of jewelers. Accordi...
-
From Hobbyist to Pro Artisan: Your Tool Upgrade Roadmap
You've carved 50 wooden spoons, sold your first custom si...
-
How To Choose a Engraving Vise?
Engraving vises are a type of clamping tool that engraver...
-
10 Essential Woodcarving Techniques for Beginners
Woodcarving is an interesting and creative art. It is not...
-

10 Tips To Teach You How To Solder Jewelry
Are you worried about the soldering technique for making ...
-
A Complete Guide to Prong Settings
Setting is a common technique in jewelry making, and claw...
-

A Complete Guide To DIY Jewelry Making
DIY jewelry making is a very interesting but not easy thi...
-

Beginner's Guide to Hand-Engraving Metal: Tools, Tips, and Tricks
Hand engraving metal is like stepping into an art form th...
-
What Are The Advantages Of Pneumatic Engraving Compared To Push Engraving?
In the engraving process, pneumatic engraving is an indis...
-
Four Practical Ways to Engrave Metal
Metal carving is the carving of a design or pattern into ...
-

Do You Know How to Engrave Tungsten Rings?
In recent years, tungsten material will be stronger and m...
-
How Do You Re-Engrave Old Jewelry?
Jewelry has a permanent beauty and unique value, and many...
-

Pneumatic Engraving Machine Vs Electric Engraving Machines
As the industrial revolution took place, machines changed...
-
The Joy of Carving Wood
Wood carving is not only a handcrafted art with a long hi...
-
How to Buy High Quality Metal Engraving Tools?
It is said that metal engraving is an extremely testing c...
-

A New Engraving Experience for You with the AT Series Motors!
We have exciting news to share with you! The AT Series mo...
-

How to Choose a Mill for Jewelry Making?
In the process of jewelry making, a jewelry mill is a ver...
-
How to Choose and Use Jump Rings?
If you are a jeweler then you are no stranger to the term...
-
Teach You How to Pick a Jewelry Engraving Machine
Jewelry engraving machine is an indispensable tool for th...
-
How Do You Cast Jewelry?
Jewelry casting is a common way of casting jewelry. In fa...
-
A Comprehensive Guide to Jewelry Engraving
Jewelry will be preferred by many people as a gift, but h...
-

Tips for Using Engraving Tools
If you are a beginner who is just getting into carving, a...
-

Katway to Participate in Hong Kong Jewelry Show 2024
In recent years, Katway's brand strength has been improvi...
-
The Creative Path of a Jewelry Beginner
Embarking on a jewelry making journey is not only a form ...
-

The Secrets of Handmade Jewelry Engraving
Hand engraved jewelry is still used by many jewelers as a...
-
Tips for Making Silver Jewelry
Silver as a metal is a very common metal, and nowadays th...
-

How Do Beginners Use Jump Rings?
A jump ring is an essential piece of jewelry making, you ...
-
Method of Making a Carving Knife and Template Set(Ⅱ)
The last blog on making engraving tools talked about the ...
-

Six Common Casting Process Introduction
Casting Process The casting process is generally used to ...
-

Method of Making a Carving Knife and Template Set(Ⅰ)
If you are interested in carving, then you must carving k...
-
Unlocking the Secrets of Metal Laser Engraving
With laser equipment, marking operations, whether it is a...
-
Do You Know What Metal Engraving Is?
To talk about metal engraving, we need to first understan...
-
About the Identification of Real and Fake Pearls
Pearls are an ancient organic gemstone that existed about...
-

About Jewelry Appraisal, You Need to Use the Tool - Gemstone Microscope
In recent years, with the number of gemstone enthusiasts...
-
Uses of Different Types of Microscopes
Many people know that microscopes can be used to look at ...
-

Katway's 2024 Jewelry Fair Tour - INHORGENTA MUNICH
In 2023, our company Katway took part in the Hong Kong Je...
-
How to choose the best jewelry engraving machine?
Do you want to make your own engraved jewelry that suits ...
-
Guide to Jewelry Engraving
Jewelry engraving is a work of art that involves pattern ...
-
Sharpening tools: A Good Helper for Jewellery Engraving
In the working process of a jewellery engraver, the perfo...
-

Katway's Journey to Jewelry Show 2023
In September 2023, Katway was invited to participate in J...
-
Vacuum casting in the jewelry process
With the continuous development of science and technology...
-
Engraving Machine Buyer's Guide on HH-R01 and HH-AT03
Common points of HH-R01 and HH-AT03 Do not need an air c...
-

Everything You Need to Know About Jewelry Engraving
Carving is an ancient skill that has been around since th...


