

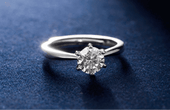
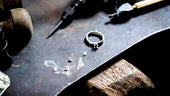
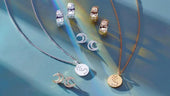
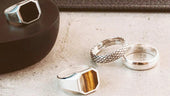
How Do Beginners Make a Simple Silver Ring?
Making a silver ring for your lover is a very romantic thing. It means much more than a simple ornament. It carries your emotions, commitment and unique memories. It sounds difficult for beginners to make a ring without the basics of silversmithing, but we provide you with detailed instructions. Follow us step by step, you can definitely do it.
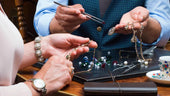
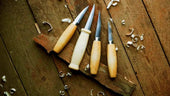
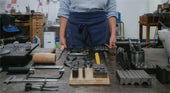
Prepare these basic tools and materials
- Steel Ruler
- Sterling silver wire
- Wire cutters
- Ring mandrel
- Rawhide or rubber mallet
- Flat file
- Sandpaper (various grits)
- Soldering kit (torch, flux, and solder)
- Pickle solution (to clean after soldering)
- Polishing cloth or wheel
Start making
Step 1: Measure the size of finger
You can use a piece of string to complete the measurement. Wrap the string around your finger and mark the string to get the required length of wire. Of course, if you have a ring sizer, the measured size will be more accurate. If you know your own or your loved one's ring size, you can skip this step.
Step 2: Choose the right silver wire
To make a simple silver ring you don't need much silver, usually between 12-16g. For ease of processing without any basic knowledge, a 12g half-round wire is good. Once you know the size of the ring, you will know how long the silver wire is needed. You can use wire cutters to cut the sterling silver wire to the correct length. Usually experienced silversmiths will add about 3mm to the measurement to accommodate shaping.
Step 3: Bend the silver wire into a circle
This step requires our Ring Mandrel. Wrap the silver wire you just cut around the shaft. You need to keep the silver wire as close to the shaft as possible. You can start with a smaller size because you can't keep it close during the winding process. If you loosen it, the silver wire will expand to a larger size. For example, if you want to wrap a size 5, you can start with a size 4.
Step 4: Sand the ends
The next step is to smooth the ends of the ring with a Flat file, this step is crucial for the soldering later on and is directly related to the solidity of the ring. Therefore, we need to take care to maximize the cross-sectional area of the ring's soldering points when sanding. There is a trick, you can use a file at an oblique angle to smooth one end, the other end of the same oblique angle sanding, be careful to sand in the opposite direction. Avoid failing to join in the same direction. Make sure that each end is completely flat so that you don't leave gaps when joining, as the solder won't be able to flow into some of the tiny gaps, which can lead to a weak weld and eventual breakage.

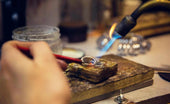
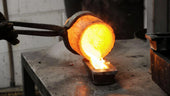
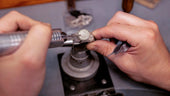
Step 5: Welding Ring
Soldering isn't as difficult as you might think, and I've written a previous post on 10 tips on how to solder jewelry that might help you with your soldering.
You can use a toothpick and cotton swab or something like that to apply flux to the seam, making sure the flux is coated all around the seam and placing a small piece of silver solder. Then use the torch to heat the ring evenly until the solder flows and fills the gap. Don't worry about damaging the ring as the temperature required for the solder to melt is much lower than the temperature required for the silver ring to melt. Once the soldering is complete use tweezers to pick up the ring and place it under cold water to cool it down and check that the joint is secure. After making sure the solder is good we move on to the next step.
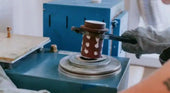
Step 6: Acid Wash Your Ring
The heat of the soldering process leaves a lot of oxides on the ring, and we need to remove these impurities by acid washing. The recipe for the pickling solution is very simple, a tablespoon of salt and a cup of white vinegar will do, no precise ratios are needed. But you will need to heat this solution to 180°F and then drop the ring in and soak it for about 5 minutes and fish it out. Be careful not to use steel tweezers, but a wooden or plastic rod. If you use steel in the pickling solution, the steel contains copper molecules that will create an electric current that will coat all the surrounding metal with copper.
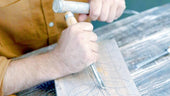
Step 7: Shape the ring
Although the ring already has an initial shape, in order to form it into a more rounded shape, you can tap the ring with a rubber mallet and Ring mandrel to make it more regular and make sure it's sized correctly for added aesthetics.
Step 8: Polishing the ring
Start by sanding with different grits of sandpaper (starting at 400 grit) to remove scratches and unevenness on the surface. You can use a damp cloth or water to lubricate the ring during the sanding process to avoid overheating. If you have polishing paste you can rub it on the surface of the ring and gently rub the surface of the ring with a cloth or brush, polishing in the same direction. After polishing, clean the surface of the ring with a damp cloth to remove any residue of polishing paste. This way a shiny ring is created.
Final thoughts
From an ordinary silver wire to a complete ring, just like your relationship from the first acquaintance to maturity, a little bit of polishing, shaping, and finally become an indispensable existence in each other's life. It takes time, energy and thought to make a ring for your loved one. This kind of dedication is a silent expression of love, more precious than any expensive gift.


You May Also Like
-
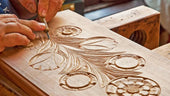
The New Favorite of Handmade Wood Carving Industry - Pneumatic Engraving Machine
With the advancement of modern science and technology, tr...
-

Metal Engraving Techniques That Beautify Jewelry
Just as one is always willing to be drawn to something mo...
-
How to Make a Gemstone Ring?
Discover how gemstone rings are made and experience the u...
-
How to practice carving flowers technique in wood carving
Whether it is the complicated and delicate flower cluster...
-

What Tools Do You Need to Be a Silversmith?
This is a beginner's guide to silversmithing. Many people...
-
What Kind of Microscope Do Jewelers Use?
Microscopes are called the third eye of jewelers. Accordi...
-

From Hobbyist to Pro Artisan: Your Tool Upgrade Roadmap
You've carved 50 wooden spoons, sold your first custom si...
-
How To Choose a Engraving Vise?
Engraving vises are a type of clamping tool that engraver...
-
10 Essential Woodcarving Techniques for Beginners
Woodcarving is an interesting and creative art. It is not...
-
10 Tips To Teach You How To Solder Jewelry
Are you worried about the soldering technique for making ...
-
A Complete Guide to Prong Settings
Setting is a common technique in jewelry making, and claw...
-

A Complete Guide To DIY Jewelry Making
DIY jewelry making is a very interesting but not easy thi...
-

Beginner's Guide to Hand-Engraving Metal: Tools, Tips, and Tricks
Hand engraving metal is like stepping into an art form th...
-
What Are The Advantages Of Pneumatic Engraving Compared To Push Engraving?
In the engraving process, pneumatic engraving is an indis...
-
Four Practical Ways to Engrave Metal
Metal carving is the carving of a design or pattern into ...
-

Do You Know How to Engrave Tungsten Rings?
In recent years, tungsten material will be stronger and m...
-
How Do You Re-Engrave Old Jewelry?
Jewelry has a permanent beauty and unique value, and many...
-

Pneumatic Engraving Machine Vs Electric Engraving Machines
As the industrial revolution took place, machines changed...
-
The Joy of Carving Wood
Wood carving is not only a handcrafted art with a long hi...
-
How to Buy High Quality Metal Engraving Tools?
It is said that metal engraving is an extremely testing c...
-

A New Engraving Experience for You with the AT Series Motors!
We have exciting news to share with you! The AT Series mo...
-

How to Choose a Mill for Jewelry Making?
In the process of jewelry making, a jewelry mill is a ver...
-
How to Choose and Use Jump Rings?
If you are a jeweler then you are no stranger to the term...
-
Teach You How to Pick a Jewelry Engraving Machine
Jewelry engraving machine is an indispensable tool for th...
-
How Do You Cast Jewelry?
Jewelry casting is a common way of casting jewelry. In fa...
-
A Comprehensive Guide to Jewelry Engraving
Jewelry will be preferred by many people as a gift, but h...
-

Tips for Using Engraving Tools
If you are a beginner who is just getting into carving, a...
-

Katway to Participate in Hong Kong Jewelry Show 2024
In recent years, Katway's brand strength has been improvi...
-
The Creative Path of a Jewelry Beginner
Embarking on a jewelry making journey is not only a form ...
-

The Secrets of Handmade Jewelry Engraving
Hand engraved jewelry is still used by many jewelers as a...
-
Tips for Making Silver Jewelry
Silver as a metal is a very common metal, and nowadays th...
-

How Do Beginners Use Jump Rings?
A jump ring is an essential piece of jewelry making, you ...
-
Method of Making a Carving Knife and Template Set(Ⅱ)
The last blog on making engraving tools talked about the ...
-
Six Common Casting Process Introduction
Casting Process The casting process is generally used to ...
-

Method of Making a Carving Knife and Template Set(Ⅰ)
If you are interested in carving, then you must carving k...
-
A Must for Newbies: An Easy-to-Follow Guide to Letter Carving in Wood
Do you want to know how to carve letters in wood? If you ...
-

Unlocking the Secrets of Metal Laser Engraving
With laser equipment, marking operations, whether it is a...
-
Do You Know What Metal Engraving Is?
To talk about metal engraving, we need to first understan...
-
About the Identification of Real and Fake Pearls
Pearls are an ancient organic gemstone that existed about...
-

About Jewelry Appraisal, You Need to Use the Tool - Gemstone Microscope
In recent years, with the number of gemstone enthusiasts...
-
Uses of Different Types of Microscopes
Many people know that microscopes can be used to look at ...
-

Katway's 2024 Jewelry Fair Tour - INHORGENTA MUNICH
In 2023, our company Katway took part in the Hong Kong Je...
-
How to choose the best jewelry engraving machine?
Do you want to make your own engraved jewelry that suits ...
-
Guide to Jewelry Engraving
Jewelry engraving is a work of art that involves pattern ...
-
Sharpening tools: A Good Helper for Jewellery Engraving
In the working process of a jewellery engraver, the perfo...
-

Katway's Journey to Jewelry Show 2023
In September 2023, Katway was invited to participate in J...
-
Vacuum casting in the jewelry process
With the continuous development of science and technology...
-
Engraving Machine Buyer's Guide on HH-R01 and HH-AT03
Common points of HH-R01 and HH-AT03 Do not need an air c...
-

Everything You Need to Know About Jewelry Engraving
Carving is an ancient skill that has been around since th...


