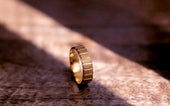
How Do You Cast Jewelry?
Jewelry casting is a common way of casting jewelry. In fact, jewelry casting is not very different from the way other metal parts are cast. Again, the metal is melted and then cast into a completely new form. Of the many casting methods, lost wax casting is the one most often used to cast jewelry.
The approximate process of the lost wax casting method is to carve a model of jewelry out of wax, then encase the wax model in plaster and place it in a hot oven. The wax melts at high temperatures so that all that remains is an empty chamber. The molten metal is poured into the chamber and the casting process is complete when the metal is molded.
The lost wax casting method has been around for thousands of years and is still widely used today. If you are interested in making your own jewelry, you can follow the steps below.
1. Making wax molds
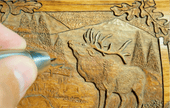
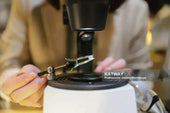
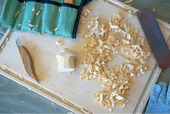
Find a piece of wax that is the right size and then use a carving knife to carve into the wax. The mold is the shape of the metal part of the jewelry that you end up with, so you can totally imagine this piece of wax as your jewelry to carve. The wax material is characterized by its soft texture, so you can easily carve any pattern you want on the wax material. However, the engraving process is not as easy as you would like it to be. You need to design the shape and pattern of your jewelry before you engrave it.
2. Make the right amount of wax wire

To make it easier to subsequently pour the molten metal into the cavity chamber. You will need to make a couple of wax wires to attach to the bottom of the wax mold. This wax wire has another function, which is to create a channel along which the melted wax can flow.
Wax filaments are actually very simple to make, just heat and melt the wax and then roll it by hand into long thin strips. Alternatively, it is possible to cut the wax into long strips with a carving knife.
The number of wax wires depends on how large the volume of the jewelry you are making is. If the volume is very small, you can make just one wax filament. But if you are making something like a belt buckle, ten wax wires may be enough.
3. Glue the mold into a suitable container
Prepare a suitable container. After placing the mold into the container, it is perfect if the distance between the inside of the container and the wax mold is about a quarter of an inch.
The next thing you want to do is join the ends of the wax wires that were glued to the wax mold in the previous step. Then take out enough wax to heat it until it melts slightly. This is the time to glue an entire mold to the bottom of the container.
4. Configuration of gypsum
You need to go to the market and purchase a bag of plaster powder and then mix the plaster with water in a certain ratio. Usually, the back of the package of gypsum powder will provide instructions on how to mix the right gypsum liquid. If not, you can go online and look for tutorials on how to mix gypsum.
It's a good idea to wear a mask while you're mixing the plaster solution to prevent you from accidentally inhaling large amounts of plaster.
5. Vacuuming of the prepared gypsum.
Here you have the option of purchasing a specialized vacuuming machine for this step. If you purchase a versatile casting machine, then the vacuuming function may be included in this as well. The purpose of vacuuming the liquid plaster is to prevent subsequent jewelry from developing imperfections due to air bubbles that remain in the plaster. The jewelry made in this way will have a lot of pockmarks and will be very difficult to deal with.

6. Pour the processed plaster into the container
Take out the container with the mold and slowly pour the plaster liquid into the container. Note that here you should never pour the plaster all at once into the container. This may re-generate air bubbles and the vacuuming operation you just did may be in vain.
After you have completely poured the plaster into the container, you can get out the tape and seal the top of the container, which will prevent excess air from getting back into the plaster.
7. Waiting for the plaster to set
Let the plaster sit for a period of time as detailed in the instructions for the product you purchased. This resting time can generally be slightly longer. Once the resting is complete, you can remove the tape and scrape the plaster off the bottom of the container with a spatula.
8. The flask is heated in a kiln
Place the flask with the mold into a high temperature kiln. It is important to note here that the temperature of the kiln should be at least 600 degrees Celsius (or 1300 degrees Fahrenheit). After being heated, the wax mold will melt, eventually leaving a cavity within the plaster. This process can take up to twelve hours, so you'd better be patient.
9. Molten metal
Place the metal of your choice into the crucible and heat the metal until it appears molten. This process of melting the metal you should ideally do at the same time as the steps above. This saves time and prevents the plaster from cracking when the temperature difference between the two is too great when you pour the metal into the plaster.
10. Pouring metal into plaster cavities

There is nothing technical about this process, which involves pouring metal in a molten state into the cavity chamber. When performing this operation, you'd better take all the precautions you can.
11. Immerse the flask in cold water
After you have completely poured the metal into the plaster, you will need to wait five to ten minutes to allow the metal to do its initial cooling. But this five to ten minutes is just a preliminary estimate. This needs to be determined by you based on the actual situation. The timing of this is very important, if you put the flask into the cold water too early, the metal may not be able to take shape. If you put it in too late in the timing, the metal may adhere to the excess plaster.
12. Remove jewelry and follow up

Use a hammer to break up the plaster and remove the jewelry. There may be some excess plaster or wax stuck to the jewelry at this time, and you can use an acid bath to give the metal a thorough cleaning. Finally, you can also polish the jewelry to add a glossy finish.
View more related articles
Six Common Casting Process Introduction
The Methods for Hand Engraving Metal
Vacuum Casting in Jewelry-Making: Tips and Considerations
Two types of casting machines: the difference between vacuum casting and centrifugal casting


