

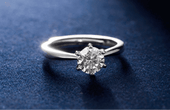
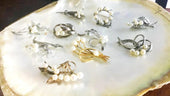
How to Make a Gemstone Ring?
Discover how gemstone rings are made and experience the uniqueness of each ring. All pieces are the result of each jewelry artisan's maximum focus on handcrafting. It is important to recognize that handmade pieces have a higher appreciation and sales value than crafts made on an assembly line. This blog will take you through the process of handcrafting a gemstone ring to understand the beauty of gemstone rings on a deeper level.
Step 1: Design and Drawing
No matter what style of gemstone ring you are making, you will always have a completed design drawing before you begin. Because the process of creating a gemstone ring is complex, the only way to avoid mistakes is to design the idea, carving route and size in advance. Refer to popular gemstone ring styles and complete the design drawings with the help of a computer.
Step 2: Choose the gemstone
The design of a gemstone ring usually consists of a core gemstone and subsidiary gemstones. There are many types of gemstones, so you can choose according to your preference when carving your own gemstone ring.
If you prefer an ornate vintage style, choose a ruby, emerald or sapphire. If you prefer a simple and stylish style, choose diamonds and crystals. If you prefer a rustic and natural style, choose opals, cat's eye or agate. The color, luster and size of the final gemstone chosen should match the design composition.
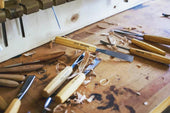
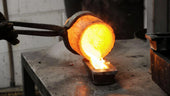
Step 3: Make a Ring
Once the design is complete, use the wax material to print out the jewelry model on a 3D printer, or you can just buy a wax model of your favorite style of ring ring. Next, fix the model in a container and pour the resin material to make the mold. Once the resin has cured, the mold is heated and the wax material will melt and flow out. Then pour the chosen metal liquid (gold, silver, titanium) into the emptied mold. When the metal liquid has solidified, open the mold and remove the molded ring ring.
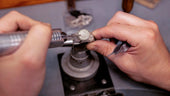
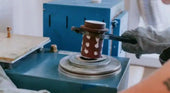
Molding
When the ring is removed from the mold, the metal will be rough and grainy. A machine is needed to polish off any unevenness on the ring so that the ring portion looks smooth and soft for the subsequent engraving steps.

Step 4: Make Metal Fittings
Adding metal fittings to a gemstone ring can add sophistication and give a better visual effect. Typical metal fittings that can be added are thin, moldable wires, stackable metal discs, or metal chains. Using a rolling mill to process the metal allows the piece of metal to be extended and reduced in thickness, making it easy to create metal fittings using cutting tools.
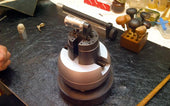
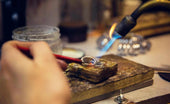
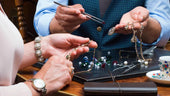
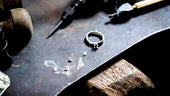
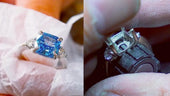
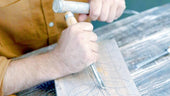
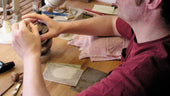
Step 5: Setting the stones
Setting the stones is the most crucial step and is the centerpiece of creating the ring. Hold the completed ring in place using a ball vise or other fixture. Next, use tweezers to pick up the stone and align it with the reserved setting, commonly known as the “claw”. Once the stone is held in place with the “claw”, place it on the fire paint to secure it and ensure that it is firmly set in the band.
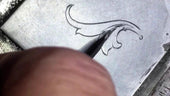
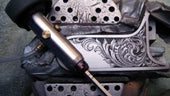
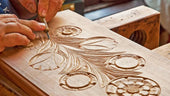
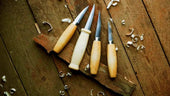
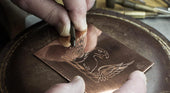
Step 6: Engraving
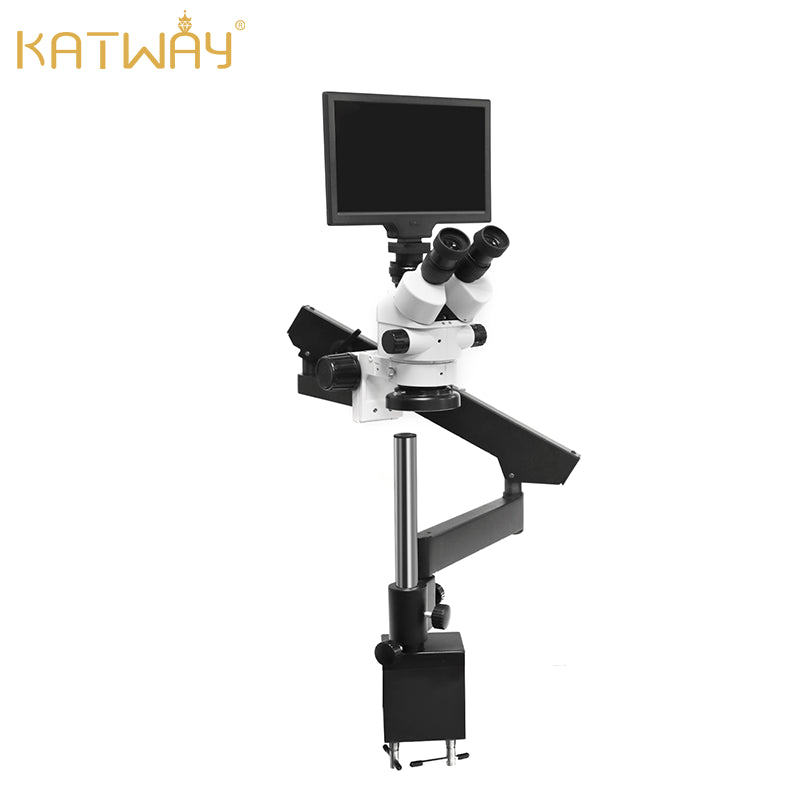
To add to the uniqueness of a gemstone ring, many people will engrave an exclusive symbol on the band. Examples include initials, anniversaries, or other motifs with unique significance. The engraving surface of the ring is magnified with the help of a stereo microscope to increase the field of view for engraving. The engraving is then done using the finest hand engraving knives, or a pneumatic engraving machine. Because the engraving area is small, the engraver not only needs to keep a steady hand, but also should not engrave too hard.
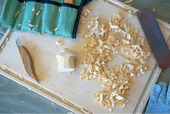
Step 7: Grinding and Polishing
Once the above steps are completed, a gemstone ring is ready. But to make it full of texture and luster, it needs to be sanded and polished. For the sanding step, simply use sandpaper to treat any unevenness in the ring. For polishing, use a polishing paste or a polishing machine to give the ring a soft metallic shine.
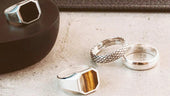
The Finishing Touch
The finalized gemstone ring needs to be soaked in a special solution, the special substance in the solution will add a protective film to the gemstone ring and increase its resistance to air corrosion. Take the ring out and wipe it clean with a soft cloth, then you can put it into a beautiful jewelry box for collection or gift, or put it in a display case to let it bloom with color.
Conclusion
The journey of creating a gemstone ring is not a smooth one, and it is one that requires patience and seriousness at all times, as well as a high level of carving skill for the carver to reach the finish line. When you understand that a gemstone ring is not easy to come by, you will realize that every step of creation is worth learning.
Creating a gemstone ring is a worthwhile investment, so if you're interested, purchase a set of carving tools and start learning slowly!
View more related articles
How Do Beginners Make a Simple Silver Ring?
10 Tips To Teach You How To Solder Jewelry
A Complete Guide To DIY Jewelry Making


You May Also Like
-
The New Favorite of Handmade Wood Carving Industry - Pneumatic Engraving Machine
With the advancement of modern science and technology, tr...
-

Metal Engraving Techniques That Beautify Jewelry
Just as one is always willing to be drawn to something mo...
-
How to practice carving flowers technique in wood carving
Whether it is the complicated and delicate flower cluster...
-

What Tools Do You Need to Be a Silversmith?
This is a beginner's guide to silversmithing. Many people...
-

How Do Beginners Make a Simple Silver Ring?
Making a silver ring for your lover is a very romantic th...
-

What Kind of Microscope Do Jewelers Use?
Microscopes are called the third eye of jewelers. Accordi...
-
From Hobbyist to Pro Artisan: Your Tool Upgrade Roadmap
You've carved 50 wooden spoons, sold your first custom si...
-
How To Choose a Engraving Vise?
Engraving vises are a type of clamping tool that engraver...
-
10 Essential Woodcarving Techniques for Beginners
Woodcarving is an interesting and creative art. It is not...
-
10 Tips To Teach You How To Solder Jewelry
Are you worried about the soldering technique for making ...
-
A Complete Guide to Prong Settings
Setting is a common technique in jewelry making, and claw...
-

A Complete Guide To DIY Jewelry Making
DIY jewelry making is a very interesting but not easy thi...
-

Beginner's Guide to Hand-Engraving Metal: Tools, Tips, and Tricks
Hand engraving metal is like stepping into an art form th...
-
What Are The Advantages Of Pneumatic Engraving Compared To Push Engraving?
In the engraving process, pneumatic engraving is an indis...
-
Four Practical Ways to Engrave Metal
Metal carving is the carving of a design or pattern into ...
-

Do You Know How to Engrave Tungsten Rings?
In recent years, tungsten material will be stronger and m...
-
How Do You Re-Engrave Old Jewelry?
Jewelry has a permanent beauty and unique value, and many...
-

Pneumatic Engraving Machine Vs Electric Engraving Machines
As the industrial revolution took place, machines changed...
-
The Joy of Carving Wood
Wood carving is not only a handcrafted art with a long hi...
-
How to Buy High Quality Metal Engraving Tools?
It is said that metal engraving is an extremely testing c...
-

A New Engraving Experience for You with the AT Series Motors!
We have exciting news to share with you! The AT Series mo...
-

How to Choose a Mill for Jewelry Making?
In the process of jewelry making, a jewelry mill is a ver...
-
How to Choose and Use Jump Rings?
If you are a jeweler then you are no stranger to the term...
-
Teach You How to Pick a Jewelry Engraving Machine
Jewelry engraving machine is an indispensable tool for th...
-
How Do You Cast Jewelry?
Jewelry casting is a common way of casting jewelry. In fa...
-
A Comprehensive Guide to Jewelry Engraving
Jewelry will be preferred by many people as a gift, but h...
-

Tips for Using Engraving Tools
If you are a beginner who is just getting into carving, a...
-

Katway to Participate in Hong Kong Jewelry Show 2024
In recent years, Katway's brand strength has been improvi...
-
The Creative Path of a Jewelry Beginner
Embarking on a jewelry making journey is not only a form ...
-

The Secrets of Handmade Jewelry Engraving
Hand engraved jewelry is still used by many jewelers as a...
-
Tips for Making Silver Jewelry
Silver as a metal is a very common metal, and nowadays th...
-

How Do Beginners Use Jump Rings?
A jump ring is an essential piece of jewelry making, you ...
-
Method of Making a Carving Knife and Template Set(Ⅱ)
The last blog on making engraving tools talked about the ...
-
Six Common Casting Process Introduction
Casting Process The casting process is generally used to ...
-

Method of Making a Carving Knife and Template Set(Ⅰ)
If you are interested in carving, then you must carving k...
-
A Must for Newbies: An Easy-to-Follow Guide to Letter Carving in Wood
Do you want to know how to carve letters in wood? If you ...
-

Unlocking the Secrets of Metal Laser Engraving
With laser equipment, marking operations, whether it is a...
-
Do You Know What Metal Engraving Is?
To talk about metal engraving, we need to first understan...
-
About the Identification of Real and Fake Pearls
Pearls are an ancient organic gemstone that existed about...
-

About Jewelry Appraisal, You Need to Use the Tool - Gemstone Microscope
In recent years, with the number of gemstone enthusiasts...
-
Uses of Different Types of Microscopes
Many people know that microscopes can be used to look at ...
-

Katway's 2024 Jewelry Fair Tour - INHORGENTA MUNICH
In 2023, our company Katway took part in the Hong Kong Je...
-
How to choose the best jewelry engraving machine?
Do you want to make your own engraved jewelry that suits ...
-
Guide to Jewelry Engraving
Jewelry engraving is a work of art that involves pattern ...
-

Sharpening tools: A Good Helper for Jewellery Engraving
In the working process of a jewellery engraver, the perfo...
-

Katway's Journey to Jewelry Show 2023
In September 2023, Katway was invited to participate in J...
-
Vacuum casting in the jewelry process
With the continuous development of science and technology...
-
Engraving Machine Buyer's Guide on HH-R01 and HH-AT03
Common points of HH-R01 and HH-AT03 Do not need an air c...
-

Everything You Need to Know About Jewelry Engraving
Carving is an ancient skill that has been around since th...


