Method of Making a Carving Knife and Template Set(Ⅱ)
The last blog on making engraving tools talked about the need to take the length of the engraving tool into account when designing a template. Next we will look at what other factors need to be considered when designing a template.
2. Thickness of the engraving knife
The types of engraving knives vary from one type to another. But if you want to go ahead and design an engraving cutter on your own that is different from the ones that are commercially available, you can also design templates that don't exactly follow the thickness of traditional engraving cutters, but simply see them as a reference.
3. Different angles of the engraving tool

It was mentioned in the last blog that engraving cutters do different things at different angles. So one more factor you need to consider while designing your engraving tool is what kind of angle you want to design your engraving tool at. This is something that you can design exactly as you want. See what type of material you prefer to carve behind.
Step 5: Design the location of the alignment holes
The alignment holes are where the engraving bit and the engraving handle lock together. You need to make sure that the alignment holes for all the engraving tools you design are in the same place so that you can make the engraving handles with less hassle. This is because you can make the same size engraving handle to fit all the engraving bits.
Step 6: Make the engraving head
You can take out the previously prepared material and cut it to the length designed by the template above. Then mark the position of the hole for the engraving bit. Next you can use a pin thwart to adjust the exact shape of the engraving head. If you have other methods of engraving, you can certainly choose the method you find more convenient for engraving. For example, CNC engraving, laser engraving or some other engraving methods. The last thing you need to do is to drill two different sized holes in the tool. One size is 3MM and the other size is 10MM. the significance of these two holes is to prepare for the subsequent installation of bolts and screws.
Step 7: Make the handle of the carving tool
Making the engraved handles is the most time-consuming and labor-intensive part of the whole process. This step also requires the most tools, but if you don't have enough of them, you will have to make some modifications or cuts in the following steps. Take a 3/4-inch diameter steel rod and cut an inch from the length to prepare it for the following. Next, punch a 4MM hole in the center of this steel rod for the M10 bolt. Then take out the fixed tool and drill a slightly larger hole in it to accommodate the engraving tool. Another thing that needs to be done here is to make a mark where the engraving tool needs to be placed. Then use an M4 tap to make the threads. This step is considered to be a great success.
Step 8: Fabrication of the hole locator
This step is still relatively easy compared to the step above. You need to first secure the engraving tool with a special fixture and then compare the holder to the engraving tool. Next, use an automatic pen to mark and drill a hole where you need to drill. Lastly, grind the threads in the holes with an M3 model threading tool. You need to always be sure of the orientation of the hole in this step, and it is best not to deviate from it.
Step 9: Determine the final length of the engraving tool
By the step above, you have essentially determined the length of the first half of the carving knife. You can start by determining what the length of the carving knife you want to make is, and then subtracting the length of the tip of the carving knife you've already made from that length, and you've got the length of the handle of the carving knife you're going to make.
Step 10: Sharpen the engraving head
If there is a coating on the surface of the material you are preparing for the engraving head, you'd better clean that coating. Of course, if the surface of the material you are preparing is very clean, you don't need to do this step. You can choose to use a diamond plate to do this step (that is, put the cutter head on the diamond plate for grinding, if you don't know how to use it, you can go to the Internet to search for related tutorials, or you can ask the merchant for the instructions).
Step 11: Cutting of the engraving tool

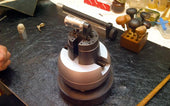
Since cutting bits are generally hard, if you still need to adjust the length of your cutting tool, you can try the method I mention below. That is to use a diamond grinding wheel to cut the cutter head. Before engraving, you'd better use a diamond tool to carve the approximate shape you want to cut on the surface of the engraving bit. Once you've determined that, you'd better fix the engraving cutter in a ball vise, and then just cut along the line that you've just drawn. This step you need to make sure that your cutting line is flat and straight, otherwise you will need to make subsequent adjustments.
Step 12: Final Wrap-Up
At this point, you need to do a final finish on the engraving tool. You can get out the abrasive paper or a specialized sander to do a final polish on the engraving cutter. This step will give your engraving tool a more standardized shape and make subsequent use easier. What you need to note here is that you need to clean the debris that falls off the cutter while you are polishing it. This will give the knives a smoother surface.
At this step, the carving knife is finally considered to be made. After learning the above steps, you can make how to shape the engraving cutter.
View more related articles
Uses of Different Types of Microscopes
Katway's 2024 Jewelry Fair Tour - INHORGENTA MUNICH


